Iron condors and iron butterflies: a first look at neutral structures
What you will learn
See how an iron condor and an iron butterfly are built, when to use them, and why neutral is not the same as risk-free
What an iron condor is
When you do not have a strong view on direction, and you just want time value and a drop in volatility, iron condors and iron butterflies are the usual choices.
An iron condor is two vertical spreads: a credit Put spread on the downside + a credit Call spread on the upside. Four strikes, with a fairly wide profit zone in the middle.
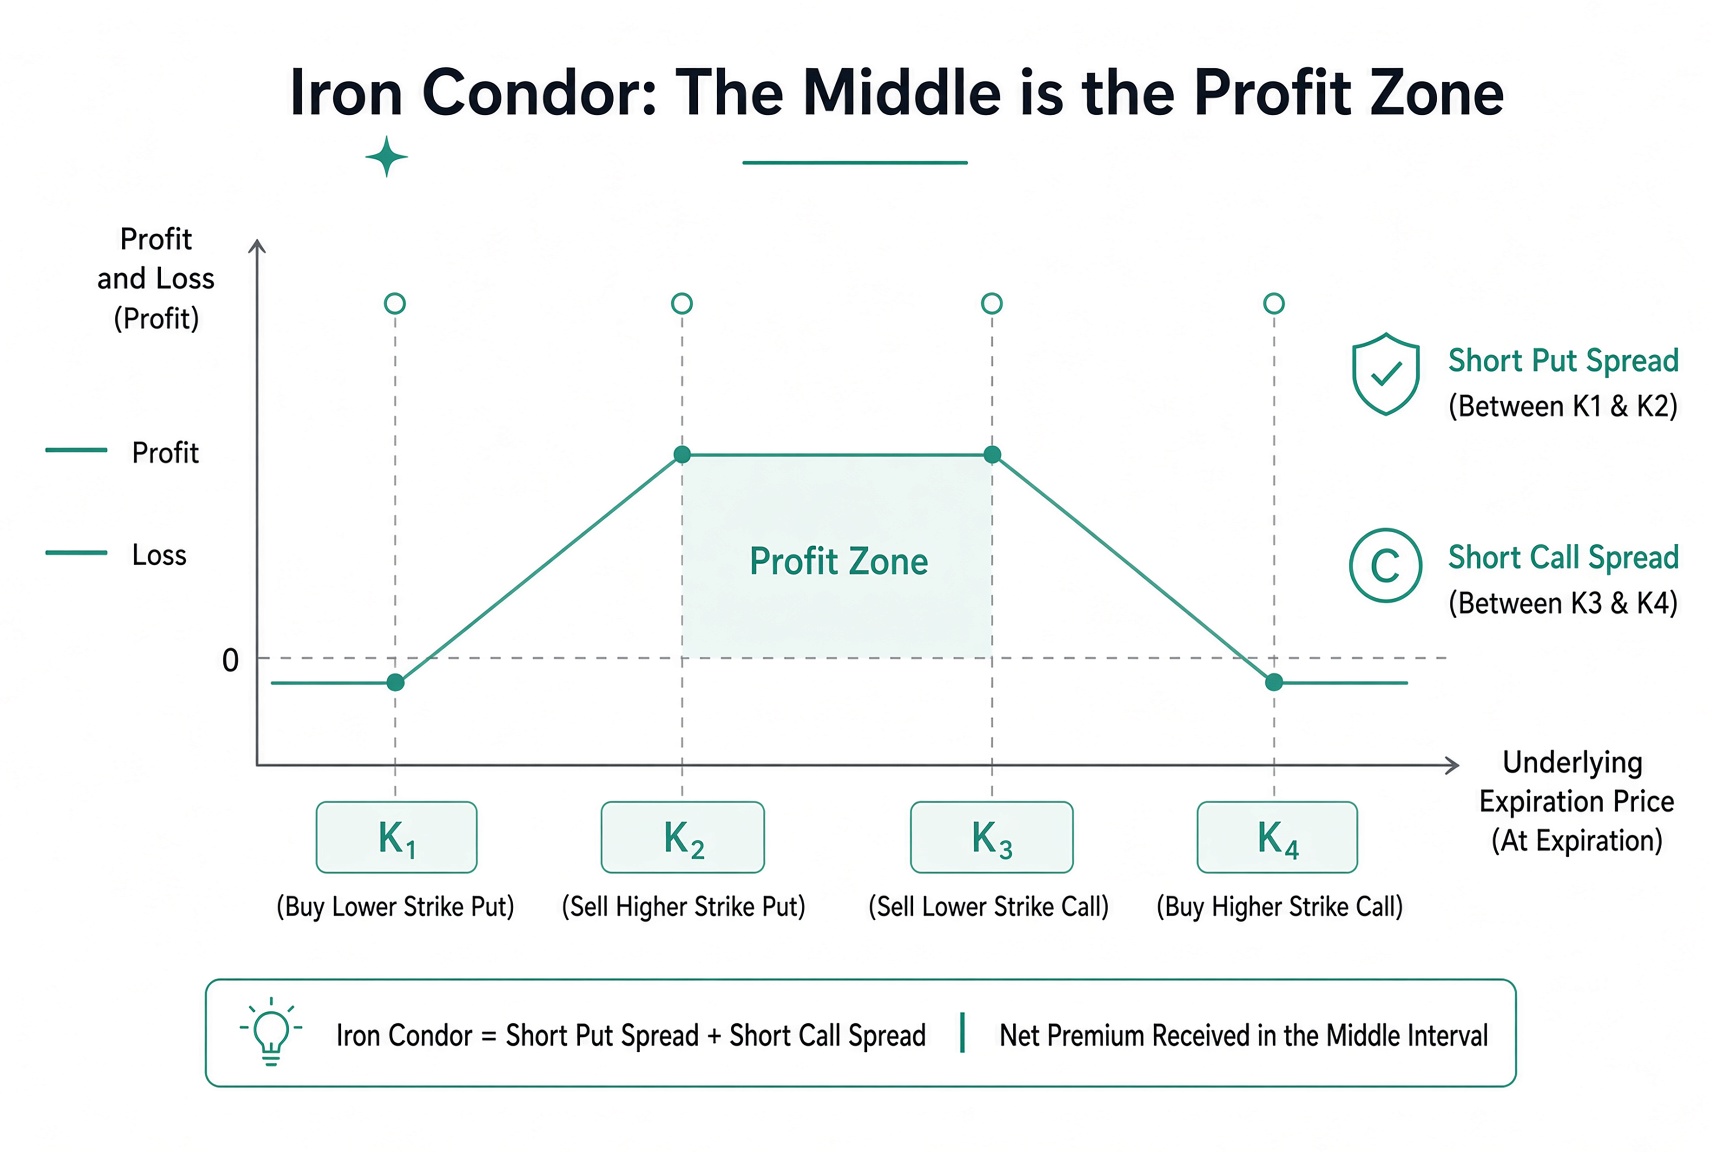
You collect a net premium and want the stock, at expiry, to sit between the two inner strikes. Max gain and max loss are both limited.
Takeaway: The middle is the profit zone; both wings are limited-loss zones. You are betting “don’t run too far.”
What an iron butterfly is
An iron butterfly is “sharper”: you sell a Call and a Put near at-the-money (a short straddle), then buy farther OTM Calls and Puts as protection.
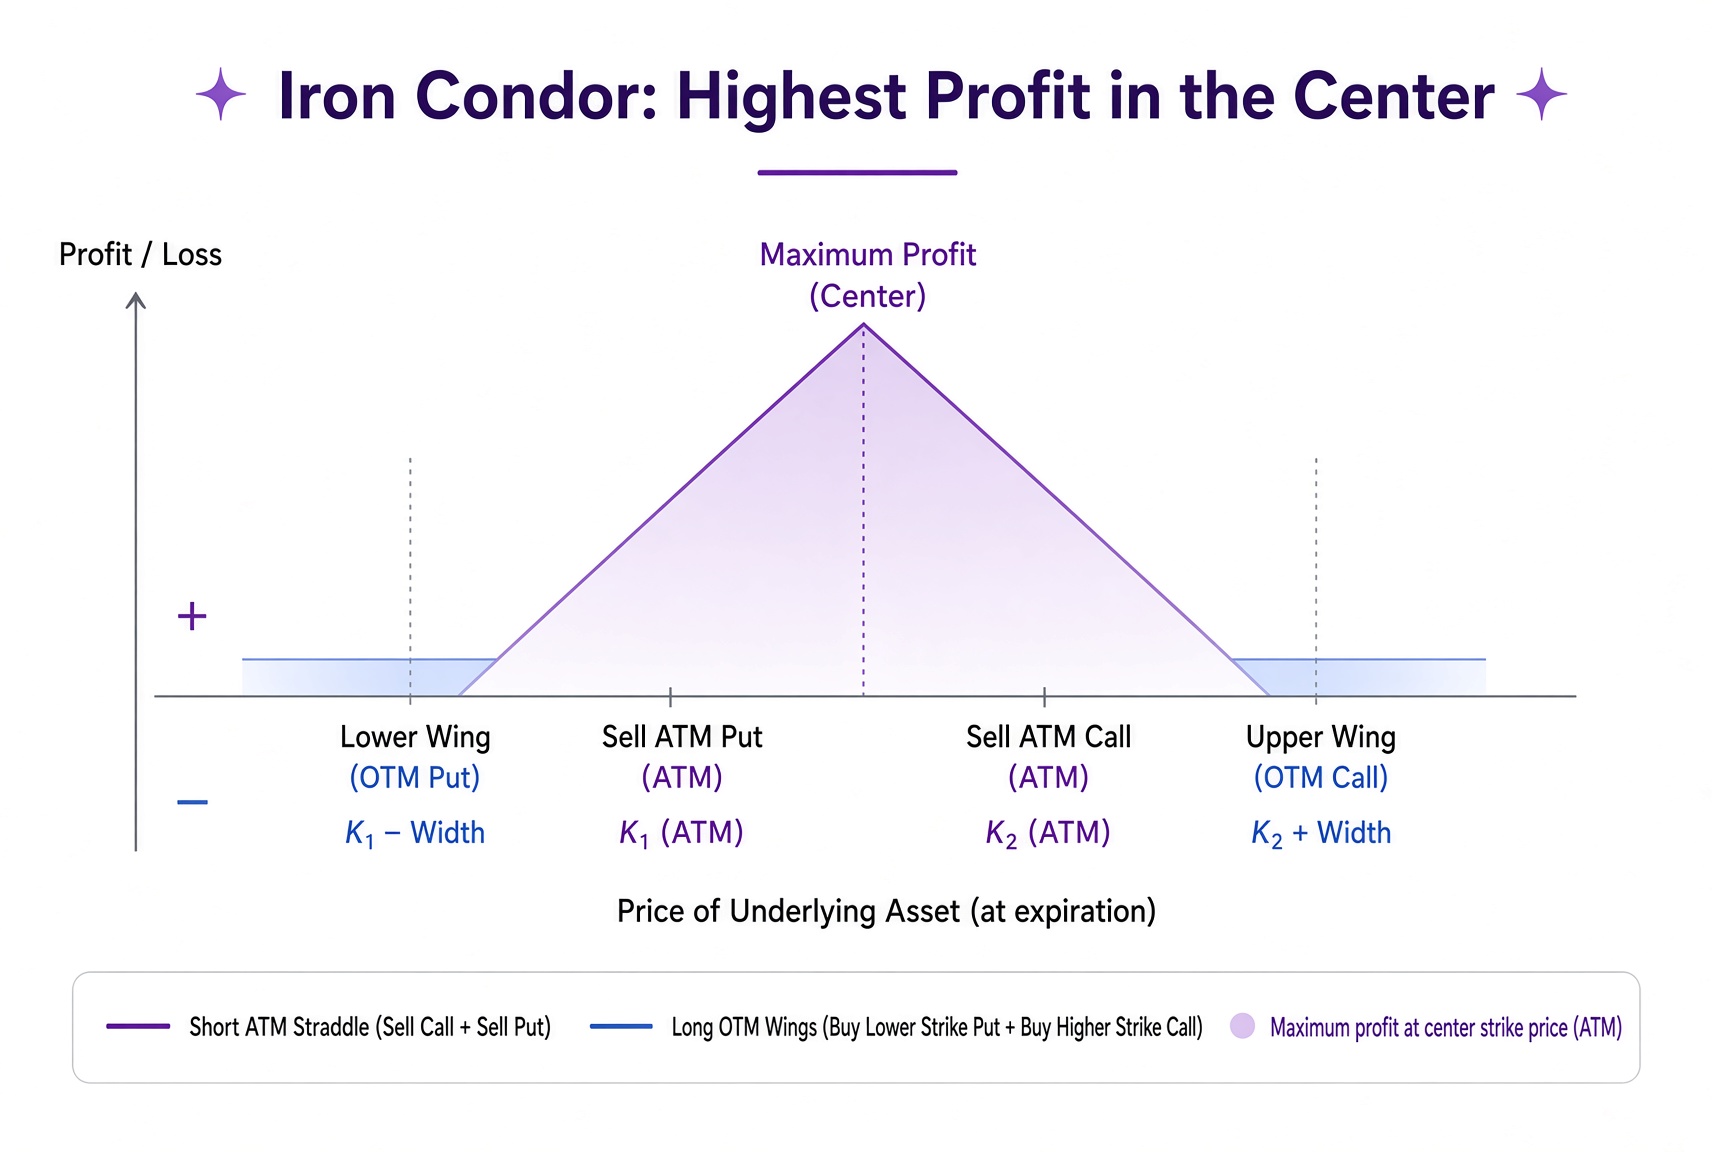
Max profit sits at the center strike. The profit zone is narrower, but the potential return per unit of risk is usually higher.
Takeaway: Profit peaks at the center. The profit zone is narrower than an iron condor’s.
When to use which
Iron condor: you expect the stock to chop in a fairly wide range, and you want a higher win rate.
Iron butterfly: you expect the stock barely to move, or current IV is high and you expect it to fall fast.
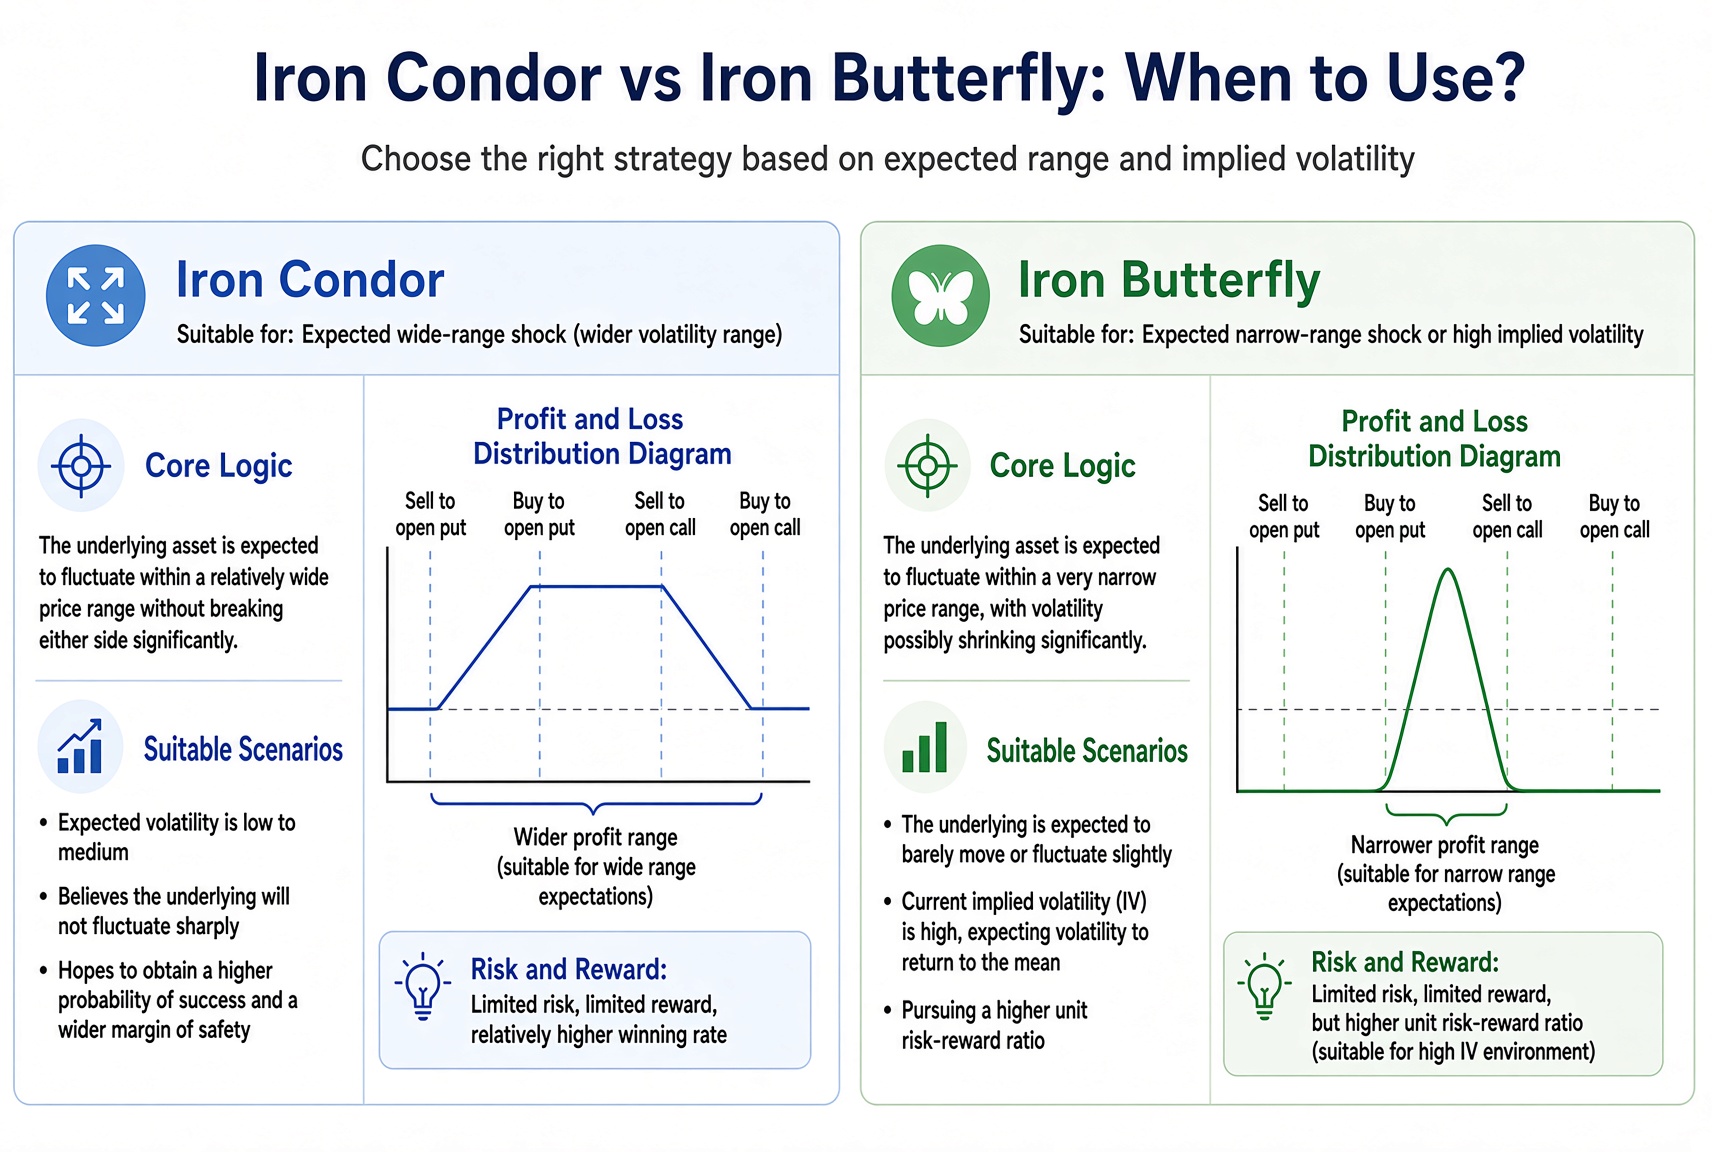
Takeaway: Different expected ranges, different choice. The narrower the zone, the higher the potential return per unit of risk usually is.
The main risks
A large one-way move in the underlying, straight through the profit zone.
Early exercise, especially into a dividend or near expiry.
Multi-leg commissions add up and can eat the profit.
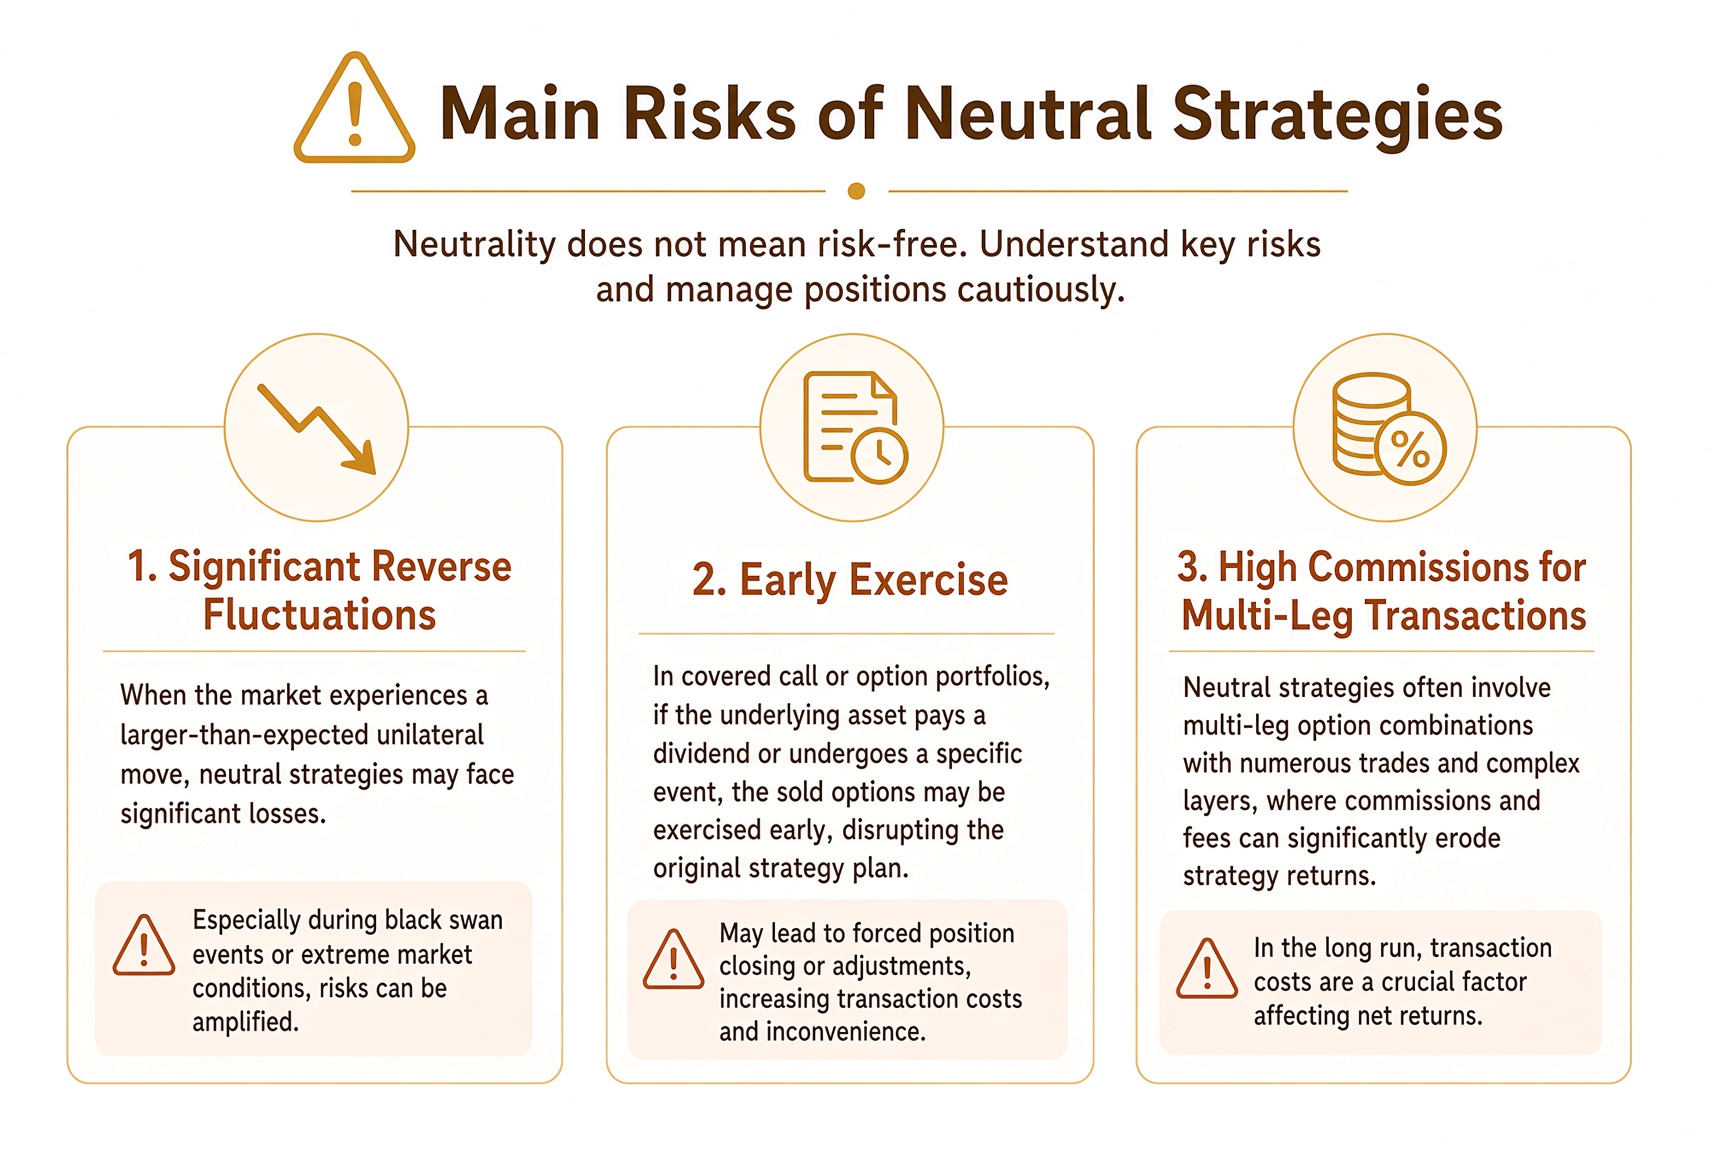
Takeaway: Neutral is not risk-free. Neutral structures are paid for time + falling volatility, not for being right on direction.
Optional extra: the series ends here
Get vertical spreads fully clear before you try an iron condor. Pick a liquid underlying, keep size tight, and do not open blindly into a major event.
The one line to keep: Iron condors and iron butterflies are defined-risk neutral structures. The core bet is “the stock does not run hard.” Use them when you do not have a strong directional view — and still keep size and risk tight.
This is an optional extra at the end of the starter path, not required reading. Use these structures when you do not have a strong directional view — and still keep size and risk tight.
Check these three first
Check these three to close the path. You can skip.
1.Iron condors and iron butterflies are defined-risk neutral structures: the stock does not run hard.
2.Iron condors are required reading; you cannot run earlier strategies without them.
3.Even with a neutral structure, size and risk control still have to stay tight.